Banner From Husk to Horticulture, coco coir production

From Husk to Horticulture: The Journey of Coco Coir Production

Discover the journey of coco coir production from coconut husks to a premium horticultural medium. Learn about the stages of processing, benefits of high-quality coco coir, and how to ensure optimal plant growth with Cocos A & B nutrients. Eco-friendly and effective, coco coir is the sustainable choice for your garden.

What is coco coir? 

Coco coir is often utilized as a sustainable and renewable alternative to traditional peat media. It is both eco-friendly and highly effective for plant cultivation. The production process of coco coir involves several stages: harvesting, husking, decorticating, washing, drying, sieving, and packaging. Each stage enhances the quality of the final product, ensuring it is suitable for horticultural applications.

Coco Coir zoomed in

Coco Coir Production Process 

Phase 1: Initial Processing (Low-Quality Coco Coir)
  1. Harvesting: The first step involves harvesting ripe coconuts, which are then collected in baskets or trucks.
  2. Husking: The outer husk is removed from the coconuts using a large knife or machete. The husks are then left to dry in the sun for several months until they are completely dry and brown.
  3. Decorticating: Once the husks are dry, the fibers are extracted using a decorticator machine, which separates the fibers from the rest of the husk.
  4. Washing: After decorticating, the fibres are washed thoroughly to remove any remaining dirt, debris and harmful (sea) salts (natrium and chloride). This is usually done with fresh water, soaking the fibers for several hours to ensure cleanliness.
  5. Drying: The cleaned fibers are dried either on large drying racks under the sun or, preferably, in special bunkers. Drying in bunkers helps avoid contamination from external factors like acid rain or bird droppings.
  6. Sieving: After the fibres are completely dry, they are put through a sieve to remove any remaining dust or debris, resulting in a clean, uniform product.
  7. Packaging: The final step involves compressing the coco coir into blocks or bales and wrapping them in plastic to keep them clean and dry during transport.
Phase 2: Intermediate Processing (Medium-Quality Coco Coir)

After Phase 1, the coco coir still contains harmful salts that make it unsuitable for plant growth. To make it suitable for horticulture, additional steps are required:

Steaming (Not Recommended):

  • Process: Steaming coco coir involves heating it to high temperatures to sterilize the material, killing all pathogens, weed seeds, and potentially harmful microorganisms.
  • Advantages: The primary advantage of steaming is the elimination of harmful pathogens and weed seeds, ensuring the coco coir is free from bacteria and fungi that could damage plant growth.
  • Disadvantages:
    • Loss of Beneficial Microorganisms: Steaming kills not only harmful pathogens but also beneficial microorganisms that are important for soil health. This can lead to a reduction in soil fertility and plant growth.
    • High Energy Consumption: The steaming process requires significant energy to heat the coir, making it costly and environmentally unfriendly.
    • Over-Sterilization: Excessive steaming can lead to over-sterilization, which can result in poor nutrient uptake, reduced plant growth, and pH imbalances.
    • Moisture Loss: Steaming causes the coco coir to lose moisture, making it difficult to rehydrate and requiring additional water and time.
    • Shorter Shelf Life: The process can reduce the shelf life of coco coir by causing the fibers to break down and become more susceptible to decay

Buffering (Recommended):

  • Process: Buffering involves washing the coco coir with a solution of calcium and magnesium to replace naturally occurring harmful salts with these beneficial minerals.
  • Advantages:
    • Reduces Nutrient Toxicity Risk: High levels of salts in coco coir can cause nutrient toxicity in plants, leading to stunted growth, leaf damage, and potentially death. Buffering helps to reduce salt levels, preventing these issues.
    • Improves Plant Growth: By replacing harmful salts with calcium and magnesium, buffering enhances plant growth and yield. These minerals are essential for plant development and help prevent nutrient deficiencies.
  • Disadvantages:
    • Residual Harmful Salts: Although buffering significantly reduces harmful salts, some may still remain, potentially affecting plant growth. This makes buffered coco coir medium quality compared to fully processed coco coir.
Buffering process of coco coir
Phase 3: Advanced Processing (High-Quality Coco Coir)

While many brands stop after the buffering process to keep production costs low, achieving truly high-quality coco coir requires an additional step: thoroughly washing out the residual salts released during buffering. This critical phase ensures the coco coir is nearly free of harmful salts, allowing plants to thrive. Here’s what this phase entails:

  1. Prevention of Nutrient Imbalances: By thoroughly washing the coco coir after buffering, almost all excess minerals and harmful salts are removed. This step is essential to prevent nutrient imbalances in the growing medium, ensuring that the environment is conducive to optimal plant health and growth.
  2. Elimination of Salt Buildup Risks: A thorough wash post-buffering eliminates the risk of salt buildup in the coco coir. Without this step, excess salts can accumulate over time, leading to nutrient toxicity, which can harm plants. Washing ensures a clean medium that supports healthy root development.
  3. Enhancement of Plant Growth: With harmful salts removed, the coco coir can maintain balanced nutrient levels, significantly improving plant growth and yield. This step ensures that plants have access to the essential nutrients they need, fostering robust and vigorous growth.

This additional washing step distinguishes high-quality coco coir from lower-quality alternatives. By investing in this extra phase, you ensure your plants have the best possible growing conditions, leading to better overall health and productivity.

Highlighting Our Coco coir

Our cocos premium is top-quality, thanks to its thorough three-phase process. It starts with harvesting and cleaning, followed by buffering with calcium and magnesium to replace harmful salts. Finally, extensive washing removes residual salts, ensuring balanced nutrients.

This results in a 99.9% pure, RHP certified substrate, promoting optimal nutrient uptake and vigorous plant growth, making it the perfect growing medium for your plants.

50L

Cocos Premium

• Completely buffered
• Stable pH value
• Guaranteed low EC value
• RHP certified
• Nutrient imbalance proof
........

Don’t Just Take Our Word for It – Hear It from a Grower

We’re excited to share a testimonial from Crooked Jaw Farm, a dedicated team providing top-quality, clean, and affordable medicinal cannabis to patients and retail stores in Maine. They’ve been using our Cocos Substrate and have shared their positive experience with us. Here’s their review.

Conclusion

Our high-quality coco coir is 99.9% free of harmful salts, but plants still need beneficial salts to thrive. Before planting, water your coco coir with Cocos A & B solution to ensure optimal salt and nutrient levels, promoting vigorous growth and flowering.

Banner-Craft-versus-Commercial-cannabis

Craft vs. Commercial: Can We Bridge the Perceived Divide in Cannabis Cultivation?

It’s the end of a long day touring a commercial greenhouse growing operation in Colorado. We’ve covered so many topics, from nutrients, water quality, guttering, and drainage systems to fuel bills, growing media, strains, and lighting. Darryl, the head of cultivation, reaches into his pocket for some rolling papers. I ask him which of the facility’s forty-five cannabis strains he’s smoking today.


“Oh—none of them. I get my head stash from a hippie girl down the way for 200 bucks an ounce.”


My surprise is greeted with collective laughter; evidently his co-workers all agree.


“None of us smoke the stuff we grow here.”


What? Not even with a generous employee discount? Seriously, these guys—seasoned commercial cannabis cultivators and consumers—were the last people I expected to be paying a premium for their smokes—and yet this scenario is far from uncommon. 


Mass-produced, large scale commercial cannabis is invariably regarded with disdain and contempt by cannabis aficionados as bland and generic. It piques their interest as much as a multipack can of Bud Light excites beer geeks.


This raises the question, what are some cannabis growers—or cannabis growing operations—doing differently that commercial cannabis producers aren’t—or can’t?


This conundrum lies at the center of a longstanding debate in the cannabis world between traditional, smaller ‘craft’ cannabis cultivation versus large-scale commercial cannabis. It doesn’t help that definitions of ‘craft cannabis’ and ‘commercial cannabis’ vary widely in their scope depending on who you talk to. While most growers agree that the term ‘craft cannabis’ originated in the Northern Californian outdoor growing scene, the line where craft cannabis ends and commercial cannabis begins remains appositely fuzzy. When I discuss this with my hosts in Colorado, it’s clear that the distinction is more nuanced than growing operation size alone; there are many other factors at play. 


“Hippie girl cries on harvest day and says a little prayer of thanks for each plant.”


Apparently, this particular ‘craft grower’ becomes very attached to her plants during their life-cycle. They refer to her as an ‘EQ grower’ rather than ‘IQ’—it’s all about emotions, energy, and feeling. She cultivates her plants in large wooden beds filled with rich, organic living soil potting mix. Each plant receives a far greater number of ‘touches’ (aka human attention) than would be economically feasible in a large-scale commercial growing operation. Careful pruning, bending, shaping, top dressing, hand-watering, foliar feeding, whole plant drying, hand-trimming—you name it. These plants sound like the botanical equivalent of Wagyu cows! 


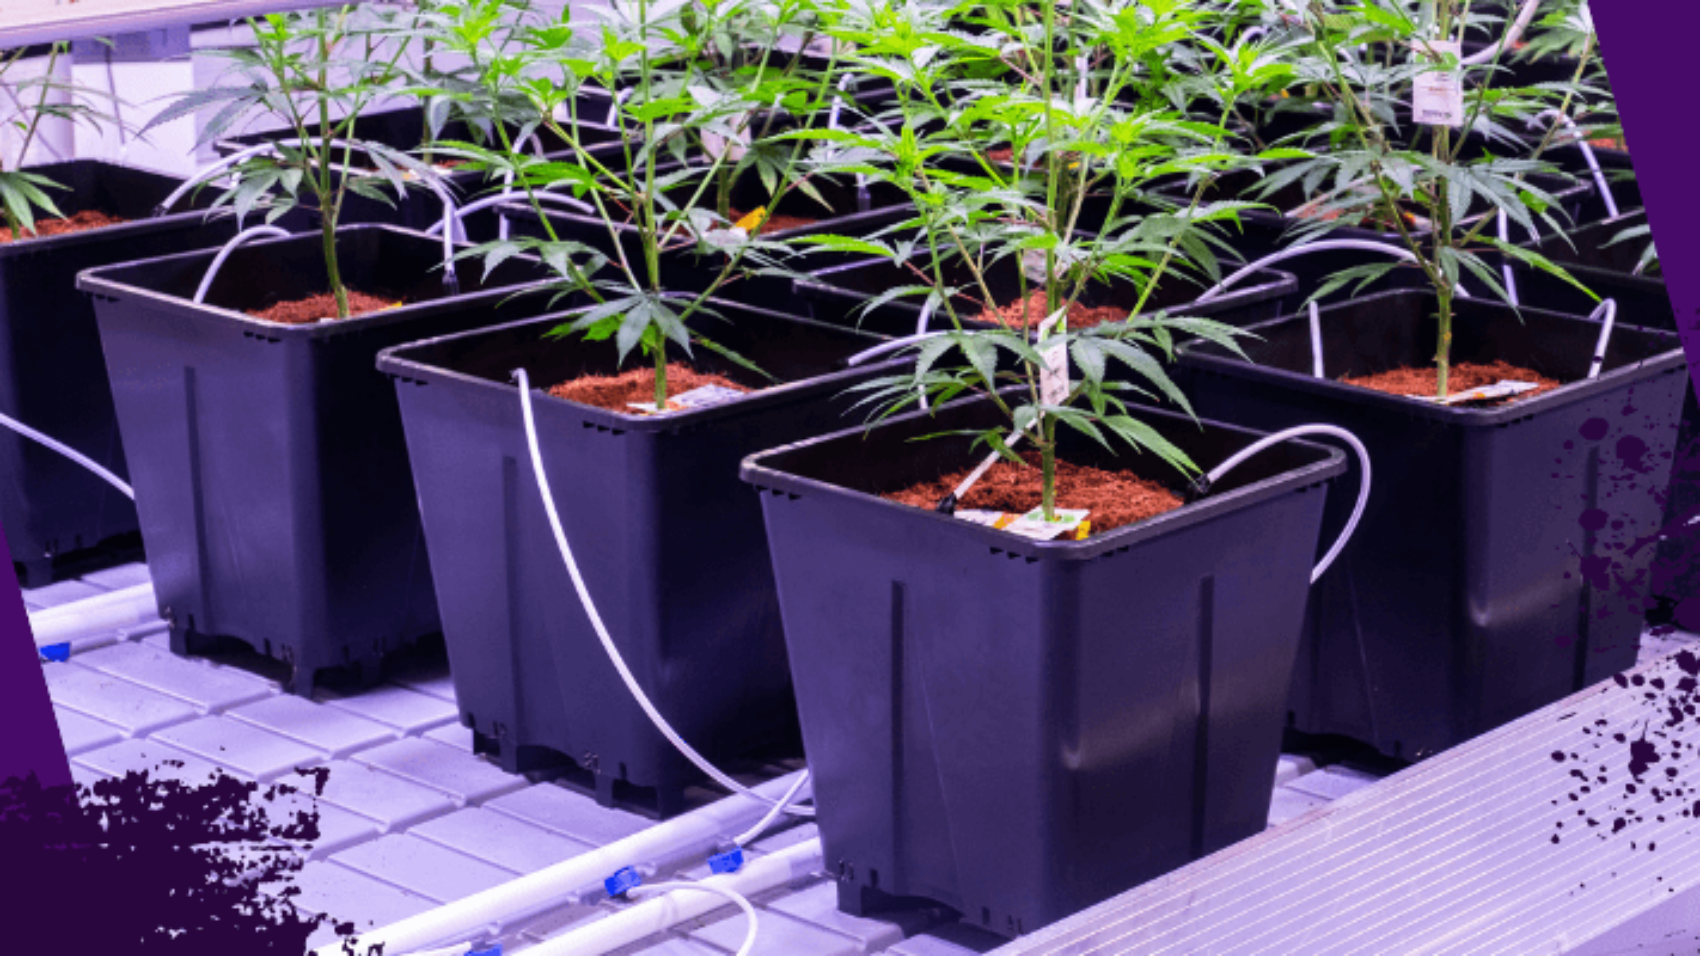
‘IQ growers,’ on the other hand, are far more data-driven; they check their smartphone for what their plants need. Sap tests, lab reports, mineral nutrient auto-dosing, drip irrigation, stone wool grow blocks, machine trimmers—the IQ grower in a commercial cannabis growing facility inhabits a very different world.


Is there a middle ground? Rest assured, this isn’t a reference to mid-grade produce or ‘mids’—it’s an inquiry into whether there is a way to efficiently and economically produce ‘craft quality cannabis’ at a larger, more commercial scale—and hopefully without any tears.


Labor costs will always be a key concern for commercial licensed cannabis producers, so adopting SOPs that don’t necessitate extraneous transplant stages, for example, or complex defoliation strategies, or any other labor-intensive activities is a given.

Are there any tactics available to all growers, wherever they reside on the cannabis cultivation continuum, that can help to boost both quality and productivity?


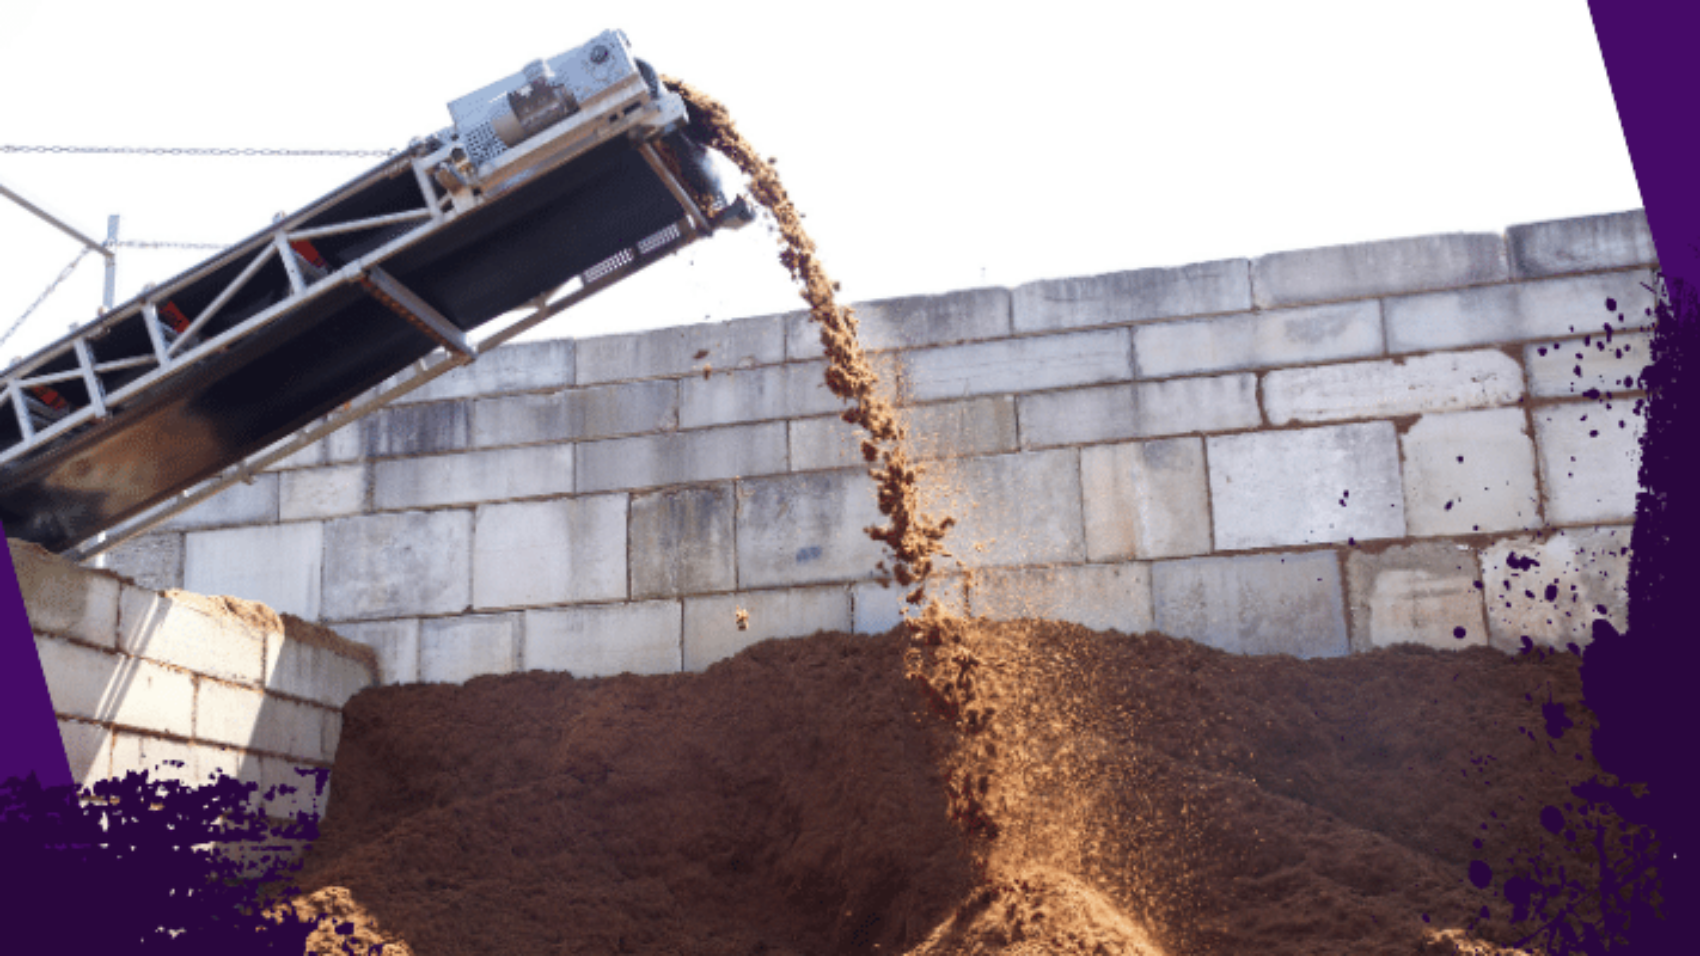
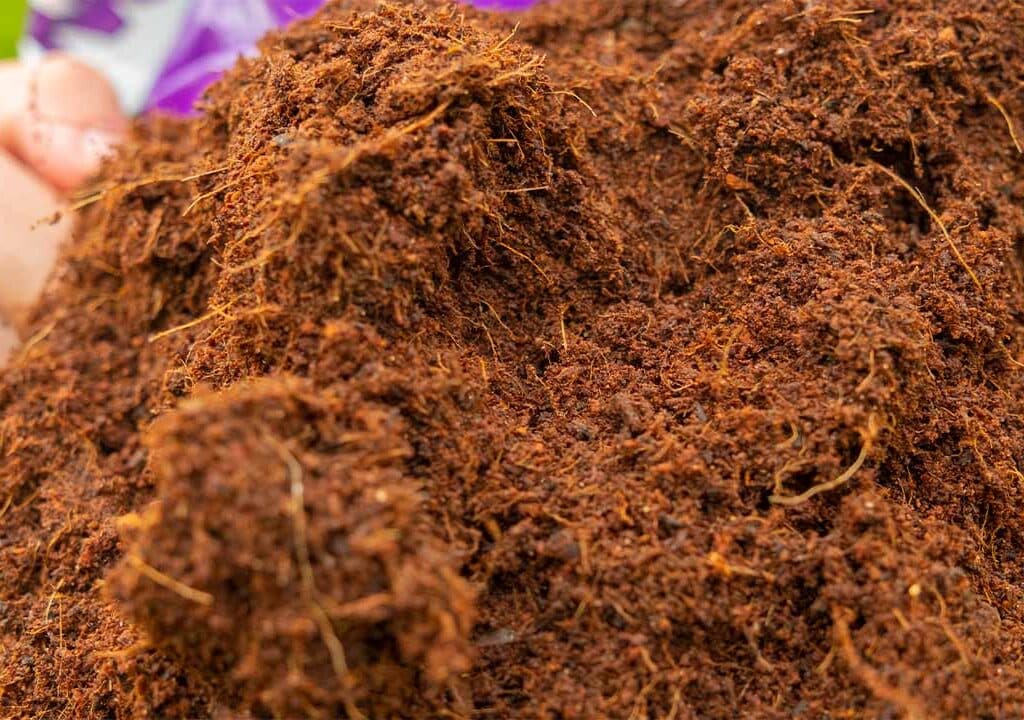
Arguably the most effective place to start is ‘one-off actions’—those ‘extra miles’ that are relatively quick and painless to implement but deliver benefits across the entire life-cycle. The obvious example here is the choice of growing medium. Investing in a superior coco mix or soil-based potting mix requires some knowledge of the market and, perhaps, a few extra dollars. Whether a cheap, entry-level substrate is used or a premium mix that meets high standards for cleanliness, consistency, air and water ratio, as well as overall performance, the pots still take the same time to be filled! Practical training of cultivation staff is also essential (i.e. tapping the container on a hard surface when half-full to get rid of any large air pockets) in order to make the most of any upgrade in media choice.

Craft growers enjoy a lot more agility in terms of adapting their grows to the needs of specific strains. Enlarging the final pot size from, say, five gallons to seven-and-a-half gallons can be very beneficial for some more vigorous cultivars as root zones have the opportunity to increase significantly in mass while the risk of salt build-up or drought is mitigated by larger containers. Commercial growers, on the other hand, need to weigh very carefully whether a fifty percent increase in the volume of growing media required for each run will deliver the extra yield they need.

What about feeding strategies? Some craft growers try to pack as much nutrition into their living soil mixes as possible up-front in the form of powdered and micronized organic inputs, whereas other craft growers prefer to start with a lighter mix, opting to supplement nutrition when needed  through periodic top-dressing and organic liquid feeds. 

Commercial growers tend to gravitate towards soilless substrates to minimize the risk of pests; mineral base nutrients are dosed, often inline, and run to waste. It’s essential that all nutrients and additives used are dripper safe (won’t clog drippers and drip lines.) If reservoir tanks are used for nutrient solution batches or recirculation, any additives need to be reservoir stable. This requirement effectively prohibits the use of many amino-acid based additives that can stimulate terpene production in cannabis. 

Strain selection is an interesting area for comparison. Commercial growers have more space to grow out seedlings and hunt for potential mother plants. While some operations rely on specialized clone producers, most take care of propagation and genetics preservation in-house. Craft growers can leverage significant advantage through long standing cannabis cultivation networks where cuttings are traded and shared. Plants are selected, not just for productivity, but for distinctive terpene profiles, shelf-life, bag appeal and potency. The scale of craft operations tends to favor more agility in the marketplace, so new strains can be introduced, tested and brought to market quicker.


Do expensive additives really make a difference in cannabis yield and quality?

The cost of additives sure adds up! Whether it’s mineral enhancements like PK boosters, enzymes, natural growth regulators or microbial products, all cannabis cultivators must do their utmost to avoid overlapping or extraneous products lingering in their feeding regimes and instead single out the best value boosters that truly deliver on multiple fronts. Look for the maximum ‘bang-for-buck’ in your boosters, ideally multi-action additives that not only enhance the production of secondary metabolites but also increase yields, improve resistance and optimize beneficial biology. Remember to calculate not only the cost per application gallon but also to take into account whether the additives are designed for use throughout the lifecycle or if they are optimized for targeted deployment, typically from the middle of the generative stage. Experienced growers know that it can become increasingly difficult for plants to access all the nutrition they need throughout the flowering phase, especially as roots fill containers and the water holding capacity of the media is reduced.


Craft Cannabis versus Commercial Cannabis is a False Dichotomy 

While craft growers highlight the care and attention they give their crops, commercial growers tend to favor the talking points of precision, consistency, and control. In reality, the essence of quality cannabis transcends these boundaries. The most successful cultivators, craft or commercial, embrace the best practices across the spectrum, from the emotional intelligence of craft growers to the technological prowess of commercial producers. In this light, the narrative of craft versus commercial cultivation evolves from a polemic into a dialogue, one that celebrates the collective achievements and continuous learning that propel the industry forward.

This is a guest blog by:

Picture of Everest Fernandez
Everest Fernandez

Everest Fernandez is a well-respected industry educator, veteran hydroponic grower, and grow light enthusiast based in France. He works primarily as a marketing and cultivation consultant and was the founding editor of Urban Garden Magazine in the UK, US, and Canada. He also writes and researches for the popular hobby horticulturist YouTube channel, Just4Growers.

Banner Organic versus Mineral nitrogen

Boosting Cannabis Quality with Royal Rush: The Nitrogen Advantage 

For cannabis enthusiasts and cultivators, nitrogen is not just an element; it’s the lifeline that fuels the growth, potency, and aroma of their plants. Understanding its role is paramount, especially when using top-tier organic fertilizers like Royal Rush. This guide highlights the nitrogen cycle’s significance and delves into how Royal Rush’s unique formulation can revolutionize cannabis cultivation. 

The Nitrogen Cycle: Foundation of Cannabis Nutrition 

The nitrogen cycle plays a critical role in making nitrogen accessible to cannabis plants, involving several key processes: 

  • Ammonification: Converts organic nitrogen from decaying matter into ammonium ions (NH4+).  
  • Nitrification: Transforms ammonium into nitrite (NO2-) and then to nitrate (NO3-) via specific soil bacteria, like Nitrobacter. 
  • Plant nitrogen uptake: Cannabis plants absorb nitrate (NO3-) as a vital nutrient, using it to synthesize essential amino groups and compounds. 
  • Denitrification: Reduces nitrates back to nitrogen gas (N2), which is then released into the atmosphere. 
  • Nitrogen fixation: Special bacteria convert atmospheric nitrogen (N2) into a form (ammonium ions, NH4+) that cannabis plants can utilize.  
Nitrogen cycle in cannabis cultivation
The Nitrogen Cycle

Royal Rush: The Organic Nitrogen Powerhouse for Cannabis

Royal Rush stands out in the cannabis cultivation world, providing a rich source of organic nitrogen derived entirely from amino acids. It contains an impressive array of approximately 20 different amino acids and boasts 8% total nitrogen, catering specifically to the nutritional needs of cannabis plants. Unlike mineral nitrogen sources, the nitrogen in Royal Rush is not immediately available, requiring soil microorganisms to convert it into a form that plants can easily absorb. This process ensures a slow, steady release of nitrogen, preventing the common issues of nutrient loss and environmental damage associated with synthetic fertilizers.

Advantages of Using Royal Rush in Cannabis Cultivation

Choosing Royal Rush for your cannabis plants comes with a multitude of benefits:

  • Enhanced growth and development: The slow-release formula ensures that cannabis plants receive a constant supply of nitrogen, essential for their growth and development.
  • Reduced risk of nitrogen shock: The organic nature of Royal Rush minimizes the chances of nitrogen shock, promoting healthier cell walls and increasing plant resilience against various stresses. For example, a high dose of mineral nitrogen will make the plant cell elongate and weaken its membrane. The plants will be weak and fragile. The gradual release of organic nitrogen will make the cell walls stronger, giving the plant better resistance to biotic and abiotic stresses (picture 2).
  • Improved soil health: By feeding the soil microbiome, Royal Rush enhances soil structure and fertility, creating a more conducive environment for cannabis growth.
Impact of mineral versus organic nitrogen on the structure of plant cells
Mineral versus Organic Nitrogen
  • Increased terpene production: The amino acids in Royal Rush not only serve as a nitrogen source but also play a crucial role in boosting terpene concentrations, enhancing the aroma and flavor profiles of cannabis.
  • Faster maturation: Evidence suggests that the amino acids in Royal Rush can accelerate the maturation process, allowing growers to achieve quicker harvests without compromising quality.

Ready to see the Royal Rush difference?

For those aiming to elevate their cannabis cultivation game, integrating Royal Rush into their nutrient regimen offers a sustainable and effective solution. Its organic nitrogen and amino acid content ensure not just vigorous growth but also improved plant health and enhanced aromatic profiles, ultimately leading to superior cannabis quality.

Carbon feeding through roots

The Secret Sauce of Supplemental Carbon in Root Feeds

Carbon is arguably one of the hottest properties in the plant world, especially for cannabis. It’s not only a key part of essential plant pigments like chlorophyll and carotenoids (used to drive photosynthesis) but also a central component of the precursors of key secondary metabolites in cannabis: cannabinoids and terpenes. Think of precursors like advanced building-blocks. In cannabis, these precursors include olivetolic acid, pyruvate and phenylamine—all carbon based molecules. It’s no wonder that carbon is in constant, high demand throughout the cannabis plant life-cycle.

Securing a sufficient supply of carbon is absolutely crucial for cannabis plants to reach their full genetic potential—and is often a limiting factor.

So, how do plants get hold of carbon? All essential nutrients, including carbon, enter the plant via two pathways—the roots and / or the leaves. Like oxygen, carbon is principally absorbed through the leaves from the air as carbon dioxide (CO2). One of the best known methods available to indoor growers to boost available carbon is CO2 supplementation. During the lights on cycle, additional CO2 is added to the growing environment from tanks or gas generators attached to a ‘sniffer’ and a regulator. Often, growers will add additional CO2 to the point where it reaches three or four times normal atmospheric levels. While the potential yield increases associated with this method are well-documented, it’s not always feasible for indoor growers as efficient CO2 supplementation necessitates sealing the cultivation space and invariably adding air conditioning and dehumidification.

What about feeding carbon via the roots? Now things get even trickier! You won’t find carbon listed among the ingredients of mineral base nutrients; only essential mineral macroelements (calcium, magnesium, nitrogen, phosphorus, potassium and sulfur) and micronutrients (boron, copper, iron, manganese, molybdenum and zinc) but not carbon! Limited amounts of carbon can be taken up by the roots in the form of bicarbonates (HCO3) but this process is pH-dependent (bicarbonates are more available in alkaline conditions which inhibit the uptake of micronutrients including iron, manganese and boron) and costs the plant a lot of precious energy to convert into a usable form.


There are so many demands on carbon!

While plants normally rely on photosynthesis for the vast majority of their carbon needs, it’s worth noting that up to half of all the carbon sequestered by plants from CO2 is allocated for growth, uptake and assimilation of nutrients, as well as maintenance respiration. (Lambers et al, 2002a). Soil growers using mycorrhizal fungi increase the demand for carbon even further as mycorrhizal fungi can consume up to 20% of the carbon yielded from daily net photosynthesis. (Lynch and Ho, 2005).


Cannabis Defoliation Practices Can Further Reduce Stored Carbon Reserves

Finally, there’s the impact of ‘lollipopping’ and ‘schwazing’ cannabis plants. These practices involve stripping away lower leaves and shoots in order to focus the plant’s energies on canopy-level flowers. (Schwazing is a more extreme form of cannabis defoliation where virtually all foliage is removed at the end of the vegetative period and again at 14 – 21 days into flowering.) While some defoliation can be useful when applied in a balanced and timely manner, (especially for increasing air flow and enhancing light penetration) net photosynthesis is temporarily reduced after defoliation, negatively impacting the plant’s ability to capture carbon and increasing reliance on (diminished) stored carbon reserves.


Meeting the carbon requirements of cannabis is a major challenge—especially during the flowering stage.

It’s clear that plants need a whole lot of carbon. In fact, around 40 to 50% of the weight of dried cannabis flower is … you guessed it … carbon! As cannabis plants shift their focus to bud development, the need for carbon reaches its peak. This huge morphological change in cannabis can be a cause of significant stress to the plant. The last thing growers need at this point is a carbon bottleneck, and yet, for many growers, it often goes unrecognized.


Can growers remove the carbon bottleneck?

Okay, it’s high time for some good news. Green Sensation is a unique and powerful root-fed supplement designed to support cannabis plants during the crucial flowering stage. Its 4-in-1 booster formulation not only directly addresses the carbon needs of the plant but it also dramatically enhances overall plant health and yield.

Green Sensation: 

Four Major Benefits for Craft Cannabis Growers


Heavier Buds

Green Sensation enhances the photosynthesis process by providing an additional carbon molecule directly to the roots. This leads to more efficient glucose production which the plant then invests in the growth and development of its buds, resulting in a heavier harvest.


Supports Terpenes and Cannabinoids

The supplemental carbon in Green Sensation also supports the production of important precursors to terpenes and cannabinoids found in cannabis. Additionally, it provides potassium, phosphorus, and iron—all crucial for the flowering phase—contributing to healthy cell division and leading to denser and firmer bud development.


Stress Resistance

Potassium in Green Sensation strengthens the plant’s structure, including stems and cell walls, enhancing the plant’s overall sturdiness and resistance.


Improved Nutrient Uptake

The carbon in Green Sensation is not only absorbed directly by the plant but also aids in mobilizing additional essential minerals. 

10L

Designed to be used from the fourth week of flowering, Green Sensation provides a rich source of carbon directly to the roots using an enhanced natural carbon compound. This approach bypasses the limitations of atmospheric carbon absorption, ensuring that plants have a consistent and readily available additional carbon source. What’s more, unlike bicarbonates, this carbon source can be assimilated by the plant without the need to expend any energy! By directly feeding carbon via the roots, Green Sensation supports a huge range of your plant’s metabolic processes, crucial for the development of dense, potent, and terpene-rich buds.

Green Sensation supplies carbon directly to where it’s needed most, ensuring that plants don’t waste energy converting other forms of carbon. This direct supplementation approach leads to more efficient nutrient uptake and supports the development of cannabinoids and terpenes.

Green Sensation is easy to use, making it perfectly suitable for all growing styles, from water 

culture to substrates and soil. Green Sensation can be seamlessly incorporated into any organic or mineral-based feeding regime.


Growers who have used Green Sensation to meet the carbon needs of cannabis, especially during the flowering stage, report significant yield increases—as high as 25%! But Green Sensation doesn’t just add bulk mass to the harvest, it also supports a commensurate increase in cannabinoid and terpene production meaning you don’t sacrifice quality for quantity.

Are you ready to witness the difference Green Sensation can make for yourself?

Do I need a substrate

Do I need a substrate?

Growing outdoors for beginners. The answer depends on your choice of growing in pots or in open ground. In the last case, you already have the soil and you don’t need a substrate as such. You can however improve the soil with certain products. If you want to grow in pots, however, you’re going to need a substrate. But which one do you use?

Choosing a substrate

The choice of a substrate is an important decision for a grower. You need to take into account the goal of your cultivation, your own experience and your budget. Every substrate has specific properties and affects your plants in different ways. For the beginning grower, a peat based substrate with rich microbiological life and several weeks prefertilisation is recommended. Ideally the substrate is designed to work with organic fertilisation. A more experienced grower could use shorter prefertilisation and mineral nutrients. This combination is geared towards larger and quicker harvests, but it’s harder to use because the grower will have to check and control the pH values closely. Plagron has two grow styles with peat based substrates:

  • 100% NATURAL. With one exception all substrates in this grow style are prefertilised for six weeks. You get the best results in combination with the algae based, organic nutrition Alga Grow and Alga Bloom. This grow style is focused on the best quality of your end product and it’s very suitable for first time growers. These substrates contain a lot of peat, which gives them a high water retention capacity. This means you’ll have to water your plants less frequently, like once every three to five days. Be careful not to over water your plant, since this will leave the substrate too moist.
  • 100% TERRA. These substrates are prefertilised for much shorter periods and they are designed to work with the mineral nutritions Terra Grow and Terra Bloom. This combination is focused on a large harvest in a shorter time, but it also has a drawback: it’s a little harder to use. You need to keep track of the pH value. Every mineral has an ideal pH range for optimal uptake by the plant. If the pH value falls out of this range the roots can’t take up the specific mineral. This means the plant won’t get the necessary nutrients and it might develop deficiency symptoms. Always check the pH value of your nutrient solution and bring it to pH 6. Ideal pH for your substrate is between 6.0 and 7.0.

Apart from soil based substrates, there are alternatives made of coconut fiber or clay pellets. These are more suitable for advanced growers, because they work best with two component mineral nutrients and a hydrological watering system.

Do you want to know more about growing outdoors?   

In our download area you can find our Whitepaper “Growing outdoors for beginners in 8 languages”. Check it out right away. Are you a first time grower and do you need help? Order our Startersguide here.

2844

Which tools and supplies do I need?

Growing outdoors for beginners. In the last topics we addressed grow boxes, pots, nutrients, additives and loads of other things. It’s a good idea to summarize what you’re going to need for your first growing project.

Which tools and supplies do I need?

  • Seeds or cuttings. Obviously, you’re going to need the plant itself. You can buy seeds, recycle them from fruit or vegetables or ask for a cutting from someone who’s already growing.
  • Pots and trays. You germinate the seeds and let them grow in a seed tray inside a grow box. There are also cheaper DIY alternatives. If you’re not planning to grow in open ground, you’ll need reasonably large pots. You’ll have to transplant every once in a while as the plant grows in size.
  • Thermometer and hygrometer. It’s always a good idea to know how warm and humid it is.
  • Tools. A garden trowel, beaker and watering can are pretty useful to plant, mix nutrient solutions and water your plants. A spray bottle can also come in very handy.
  • Substrate. You’ll need a different soil for every phase of a plants’ life.

    • Young seedlings go in seeding and cutting soil.
    • Later on, plants will be transplanted to larger pots and finally (if you choose this method) into open soil. The pots will need to be filled with a substrate.
    • Improve the soil of your planting area with worm humus.

  • Base nutrition. Strictly speaking a plant needs nothing more than what nature can give it. You will get better results, however, if you add a fertilizer. A nutrition that is designed to work with the substrate is preferable.
  • Sticks and supports. Once a plant gets bigger later on in the year, it will start to hang. Support it with sticks or a rack, for example made of bamboo.

2959

Do I need base nutrition?

Growing outdoors for beginners. Plants need certain elements to reach flowering. Three of these elements can be gotten from air and water: carbon, hydrogen and oxygen. But apart from these, a plant needs other essential nutrients. An element is called essential if a plant cannot complete its life cycle without this element and no other element can take over its role. To supply your plants with these nutrient elements, you need an NPK plant fertilizer.

NPK nutrition

Nitrogen, phosphorus and potassium are the best known nutrients that plants require. But you’re not done with only these three elements because your plants need several others in order to grow and flower. Sure, they need less of each of these elements, but they’re still essential to  the end result of your harvest. Plagron’s base nutrients provide your plants with these minerals.

Secondary nutrients

  • Calcium. Helps with nutrient uptake and increases the stability of the cell wall.
  • Magnesium. This is a component of chlorophyll, it stimulates photosynthesis and the transportation of potassium.
  • Sulphur. Essential to the formation and transportation of proteins. It also catalyzes the production of chlorophyll and is good for the taste of your end product.

Micronutrients

  • Iron. Helps with the production of chlorophyll, proteins and carbohydrates.
  • Molybdenum. Promotes the uptake of nutrients and transforms nitrates (nitrogen) into amino acids.
  • Copper. Important to carbohydrate and protein metabolism. Strengthens cells.
  • Zinc. Forms growth hormones like auxine and influences the production of chlorophyll.
  • Manganese. Promotes cell division (mitosis) and enhances the plants’ metabolism.
  • Boron. Important to the formation of the cell walls. It also assists in the regulation of water flow.
  • Silicon. One of the building blocks of cell walls.
2855

What influence does nature have?

A plant has some basic needs: light, water, carbon dioxide, a nice temperature and humidity. By growing outdoors you get all these basics for free. This is awesome, but there’s a catch: you don’t control how much of these basics you get. Apart from that, your plant is also exposed to weather extremes.

Too much is always wrong

The weather doesn’t care about your cultivation plan. The climate in which your plants grow can’t be controlled. One day it will rain and the next the sun may shine. Your plants will adapt their growth to the situation. The rule of thumb is simple: too much of one thing is never good. Sunlight is essential, but if things are too hot and bright for a long time your plants will not be able to absorb nutrients as well. The plant will reduce leaf surfaces (shriveling) to cut down on moisture evaporation. This is a natural reaction of the plant to protect itself in an environment with no rain. On the other hand, too much rain falling and sinking into the soil will reduce the amount of oxygen. This may increase the chances of roots rotting and it will inhibit your plants’ growth.

How to protect your plants?

  • Initially, you need to be sure that your seeds are comfortable being raised outdoors. This is especially important if you want to move the plants outside fairly early, around the middle of May. You need plants that can handle lower temperatures.
  • Once your plants are outside, you need to ensure they get enough water without being too wet or too dry. Preference for watering are different for each species and variety, so read the description when buying seeds.
  • Ensure your ground has good drainage and use soil improving products. These measures can make an excess of water reasonably controllable. The amount of sun is more difficult to control, especially when plants are fixed in open ground. Burnt pots can be relocated out of the sun. This has the added advantage that you can move your plants to a safe spot in case the weather turns bad, with hard rain, stormy wind or hail.

You can use a rain barrel to compensate for dry periods. By storing the water when it falls, you have a ready supply when it’s dry. Be aware that a rain barrel can be a breeding place for insects and microbes.